Friday, November 9, 2012

Crumbly raspberry and oat slices

Crumbly berry and oat slices
 
It is spring here, going into summer, so in a couple of months we should be inundated with berries! This is a delicious slice to make for an afternoon snack. I love raspberries in this, but then again I love raspberries in everything!!

100g plain flour
100g plain wholemeal flour
175g porridge oats
175g butter
150g sugar
Finely grated rid of 1 lemon
250g fresh or frozen berries
Icing sugar

1. Lightly butter base and sides of a shallow 27x18 rectangular baking tin or similar sized roasting tin
2. Put flour and oats in a bowl. Rub butter into them. Stir in sugar and lemon rind and continue to crumble the mixture until it starts to cling together.
3. Turn half the mixture into the tin and put it down into an even layer. Scatter the berries over the top. Sprinkle with the remaining crumble.
Bake in a preheated oven 180 degrees celcius for 45-60 minutes or until the topping is turning golden. Cut into fingers and leave to cool. Dust with icing sugar and enjoy!

Monday, September 24, 2012

Dad's Italian Biscuits

I am not sure where my dad got this recipe - though it must have been from an Italian friend or recipe book. They were my mothers favourites. Every now and then she would get a craving for them and she'd turn to dad and say "Johnny, make me some Italian biscuits", and he would. As a child I didn't really appreciate the subtle sweetness of these - I'd make sure I grabbed the one most liberally doused with icing sugar. These days, I love the subtle vanilla and lemon flavour of them. OK, to be honest, I still love the icing sugar - just a dusting though, not a snowfall! My dad has slowed down as he has gotten older, and he has problems with one of his hands, so he does not cook as often as he used to. Dad's precious recipe book has been bequeathed to me. I've had it now since last Christmas. So when dad asked me last week, "have you made the Italian biscuits yet?", I knew what he meant. He's coming over tomorrow for lunch - and I have a lovely tin filled with Italian biscuits ready and waiting for him.

Dad's Italian Biscuits

Ingredients

1 3/4 cups self raising flour
60g butter or marg
1/2 cup caster sugar
1 tsp grated lemon rind
1 tsp vanilla
1 egg
1/4 cup milk

icing sugar for dusting

Method

1. Sift flour, rub in the butter or margarine. Add sugar, mix well, Make a well in the centre and add the combined lemon rind, vanilla, egg, and milk. Mix with a wooden spoon until it is a soft, pliable dough.
2. Turn onto a lightly floured board and knead gently until the dough is smooth.
3. Roll dough out gently until 1/2 inch thick. Cut into rounds. Place on a greased baking tray. Bake at 200 degrees C, for 15 minutes of until a light golden brown. Cool.
4. When cool dust with icing sugar and enjoy.

Wednesday, September 19, 2012

Spinach and Feta Pie

This is a great little pie to make when you have lots of green spinach or spinach-like plants in your garden (or at the farmers markets lol). I usually use english spinach, rather than silverbeet or chard, as it seems to have way less moisture. I also will throw in some of my perpetual spinach, and a few leaves of sorrell which give a lovely lemony acidity to counter-balance the saltiness of the feta. If you don't have sorrell squeezing half a lemon into the spinach-feta mix will do just as well.

It is lovely served hot out of the oven, but it is also very nice served cold with a salad - making it a nice dish to take to a picnic!

Ingredients

Filling
About 400g of spinach/perpetual spinach - chopped roughly
A few leaves of french sorrell or the juice of half a lemon
300g of green onions/spring onions - sliced
200g feta in small cubes
4 eggs beaten

Pastry
A pack of filo pastry
olive oil

Method
Preheat oven to 200C.

Mix the filling ingredients together. taste and season if necessary (usually only pepper, as the feta will salt the dish).

Take a sheet of filo and lay on your oiled baking dish. Brush lightly with olive oil, and lay one cross-ways across it. Continue layering the filo until you have about 14 sheets, brushing lightly with olive oil on every second sheet. Doing this in my square dish allows the filo to create a thin layer of pastry up the sides of the dish/pie and will then fold over the top a little. I then use extra filo to fill the gap. But if your dish is bigger or you don't want to have the pastry on the sides then feel free to trim away!

Fill the pie dish with the filling mixture, pressing down firmly. Top with 7-10 layers of filo sheets. Brush the top layer with olive oil.

Place in over and bake for about 50 minutes or until pastry is golden and crunchy. Serve with a green salad.

Thursday, August 23, 2012

Beef Stroganoff

There are a million recipes for beef stroganoff, but THIS is the strogonoff that my dad makes. So in my eyes it is comfort food, and the best stroganoff recipe out there.

Ingredients

250g mushrooms sliced
500g blade steak
1 onion fine diced
1/2 cup of sour cream
1 tbs tomato paste
1/3 cup of beef stock
1 tsp sour cream

Method

Cook onions in oil until translucent. Add in beef and brown. (if your pan is small you might want to brown the beef in batches so it doesn't stew).

Once all the beef is browned add in the mushrooms, a pinch of salt and pepper, and pour in the stock. Cover and simmer for 5 minutes.

Add in the sour cream and cornflour and stir till thickend. Simmer for another 5 minutes.

Serve with something green like snow peas, beans, or brocolli, and some potatoes or pasta.

Enjoy!

Sunday, August 19, 2012

Home made chicken noodle soup

I always loved it when my dad made his chicken noodle soup. So light and filling and yummy. Now that I make it myself I love it for many reasons - because it reminds me of home, because it makes a bucketload of soup (very economical), because it is so easy to make, and because it is good for you! These days I tend to make the soup, and then use the poached chicken for salads or in other dishes. I have the veggies and broth with noodles.

One pot of soup makes many many dishes.

Home made chicken noodle soup


1 whole chicken
3 carrots sliced
2 parsnips sliced (we do lengthways quarters, just a family thing)

1 onion diced
1 garlic finely chopped
water to cover
1 tbs chopped fresh parsley (optional)

salt and pepper to taste
egg noodles for serving

Cook onion on a low heat until translucent in a big old soup/stock pot.  Pile all the other veggies in. Sit the whole chicken on top. Cover with water. Bring to boil and then lower the heat and simmer for about 50mins - 1 hr or until the chicken is falling off the bone. Adjust your seasoning of salt and pepper to taste. Remove chicken. Use a paper towel to skim any fat/froth from top of soup. You can then either shred the meat and return to the pot or use the poached chicken in other dishes.

Serve soup with freshly cooked egg vermicelli noodles.

Makes about 10-12 bowls of soup, freezes well (sans noodles), and lasts in the fridge for days.

Saturday, August 11, 2012

Placki z jabłkami (aka apple pancakes)

I bought some yummy apples at the farmers markets a couple of weeks ago & figured I should use them up!
Apple pancakes are just delightful served warm, and are also nice served cold so they make a lovely snack to take to work/school/picnics. Very easy to make - if you can make a pikelet you can make these babies.

Ingredients

2 eggs
350ml milk
2 tbs sugar
2 1/2 cups of self raising flour
3 small or 2 large apples

bit of butter for frying
icing sugar to serve

Method
Whisk eggs, sugar, milk till frothy. Fold in flour.

Peel, core, half and finely slice apples.

Makes a generous amount for breakfast or morning tea :)
Heat pan, rub v lightly with butter. Put a spoonful of batter into pan, press two halves of apple into the batter. Cook till bubble appear. Flip over and cook till the bottom is brown.

Serve with icing sugar sprinkled over the top. They are also nice with a bit of cinnamon in the batter - a bit apple tea-cakey. :)

Note: You can also slice the apples into match-sticks or even grate them and just incorporate them into the mix instead. I just prefer this method because you get a little bit more crunch to the apple.

Thursday, August 2, 2012

Chive Kluski with Garlic Cream

Love love love this. I was tired, and had only odd things in the fridge - leftover mashed potato, boursin, half a carton of cream, and a rubbery carrot. I really must go shopping... Anyway, mother is the neccessity of invention, so I took on the challenge, and came up with this dish. OMG it is really yummy. It's a take on a normal potato kluski (see my kluski recipe for more detail). Basically to the potato kluski recipe add 1 bunch of finely chopped chives. Then boil them and strain them. These kluski are soft, pillowy, and savoury. A great addition at this point to soups and stews... I can just imagine them in a chicken soup. The experiment was not to end here, though...


To a pan add a lug of olive oil with 1tsp of butter. Add in the kluski and cook until golden on the outside. At this point they are great as a side dish to steak etc - soft inside, slighty crunchy outside, with that lovely slightly oniony flavour. But, I wasn't yet done.


Pour in some cream and crumble in 1/2 a pat of boursin (a lovely creamy garlicky cheese). Stir till melted and the sauce thickens. Eat with cries of pleasure at just how delicious it is. I would have sprinkled some herbs on top, but I had used all the chives and it was too dark and cold to go outside and find any herbage... but I think a little bit of parsley or thyme would be lovely on top.


Monday, July 16, 2012

Pea and lettuce

This is a Jamie Oliver dish and it is surprisingly yummy. I say surprisingly because I was not sure how cooked lettuce would taste. Turns out, it tastes mighty fine. Jamie's recipe called for gem lettuce (which I think is baby cos lettuce) - but all I had was iceberg and it worked nicely. Jamie has other versions of this approach on his site - ie braised peas with spring onion. I'm also thinking that when summer comes along doing this with fresh peas, and adding in some fresh greens from the garden would also be pretty cool - there could be endless tweaks to the flavour. Imagine this with lemony sorrell and some fish... mmm yum - there will be experimentations I am sure!

Ingredients

a knob of butter
1 tbs flour
300ml chicken stock
400gm peas and 1 tbs mint leaves OR a 400g bag of mint peas
3 handfuls of finely sliced lettuce

Method

put the butter, flour and stock in a pan and stir until it makes a bubbling golden sauce. Add in the peas, mint, and lettuce, and cook until the veggies are tender. If you see your sauce drying up reduce your heat and add a splash more stock.

Easy peasy!! (yes, I went there!)


Sunday, July 8, 2012

Monte Carlos

Love love love these biscuits! The recipe I used didn't specify how big to make the biscuits, so we ended up with rather large biscuits - but they tasted great nonetheless.  I was a bit worried they might have been a bit dry, but they were perfectly cooked & with a lovely soft melt in the mouth crumble. Next time I shall make try to make them in teaspoonsize balls. We used my homemade raspberry jam for this, which is tarter than store bought jam, and the tart fruitiness of the jam worked beautifully against the smooth creaminess of the buttercream and biscuit.

Ingredients

185g butter
1/2 cup brown sugar
1 egg
1 1/4 cups self-raising flour
3/4 cup plain flour
1/2 cup coconut
raspberry jam

Filling

60g butter
3/4 cup icing sugar
vanilla
2 tsps milk

Method

cream butter and sugar until fluffy, add egg and vanilla. Add sifted dry ingredients and coconut, mix well. Roll into balls, place on lightly greased tray, and roughen surgace with a fork. Bake in a moderate oven 10-15 minutes. Remove to cool.

Filling

cream butter and blend in remaining ingredients, using just enough milk to make mixture spreadable.

To assemble

spread one biscuit with jam, the other with buttercream filling. Sandwich together. Serve with tea or milk, and sigh with happines!

Roast Beef with Yorkshire Puddings

Last night I made roast beef with yorkshire puddings - mmmm - it was very yummy. I had made roast beef before, but had never made Yorkshire puddings. When I saw the recipe for them on the  Jamie Oliver site, I knew I had to try them. I'm glad I did because, like all of his recipes (or at least the ones I have tried), they are delicious!!

Roast beef
Get a 1kg piece of roasting beef
Slather it in mustard
Chop up some chives, rosemary, and roll the roast in it. Preheat oven to 240°C . Place the beef in theheated oven, reduce heat to 200°C and cook for an hour for medium beef. Cook another 15mins for well done.

If you want roast veg, you can cook them with the beef.

Yorkshire puddings
2 large free-range eggs
100g plain flour
100ml milk

Put a muffin or cupcake pan in a 200°C oven.
Mix the ingredients to a runny batter.
Take out the hot pan from the oven. Drizzle some olive oil (or you can use the fat from roast beef etc if you have some and aren't making gravy) into the pan, then fill each about halfway with the batter. Place back in the oven and cook for 15minutes.

Gravy
Once you have removed all the meat and veg from the roasting pan place it on the stove at low heat. Add a dash of water to deglaze the pan, and a tablespoon of cornflour and whisk until the gravy is the consistency you desire. If you need more water you can add it at any time. Note - you can also use wine or brandy to deglaze the pan.

Thursday, July 5, 2012

Rose Cream


I admit it - I made cupcakes from a cake mix. I did, however, top them with a wickedly delicious rose cream made out of my very own roses. It had such a lovely taste - creamy, and slightly turkish delighty. Very nice. I think this would make a delicious pannacotta too - one day I might get around to trying it.

Ingredients 
2 handfuls rose petals
125g sugar
500ml cream

Method
In a mortar and pestle pound the rose petals and sugar together until they form a paste. Add to the cream and beat until firm. Top your cake/cupcake/pudding with the cream and enjoy.

NB: You can add a bit of food colouring to make the cream look pinker if you wish. If you don't have any rose petals, or you want a stronger taste of rose, a few drops of rosewater will add more flavour.

Wednesday, June 27, 2012

Dobos Torte

The Dobos Torte is a many-layered cake, with a chocolate cream filling and icing, and a glaze of caramelised sugar.It is delicious, and it takes time to make. My best friend and I made one for my birthday, and it was super yummy - well worth the effort. This recipe lasts well - it was better the day after it was cooked, and still moist and yummy two days after that. Then it was all gone, so I can't tell you how long it might have lasted!!
Dobos torte, with slightly wonky layers and oozy chocolate filling,
served with cream and walnut toffee

I'm going to post this in stages, as it will help you better with the flow of what needs to happen.

Firstly make the chocolate cream filling/icing.


150g semi-sweet chocolate melted
6 eggs
1 cup of sugar
1 cup butter

Beat the eggs and 1 cup of sugar in the top of a double-boiler until the mixture thickens into a custard - it will have the consistency of a slightly thick creme anglaise. Remove from heat and beat in the melted chocolate and the butter (the heat should melt the butter into the mixture for you).

Set aside to completely cool. This is very important. We actually filled the cake when it was not completely cool, and it did ooze a little - as you can see in the picture. Had we waited we would have slightly thicker and more even filling.

Make the cake


5 eggs, separated
1/2 cup sugar
1/8 tsp salt
1/2 cup sifted plain flour

Beat the eggwhites until stiff.
Using the unwashed beater, beat the egg-yolks, sugar and salt, until the mixture thickens.
Fold the egg yolk mixture into the eggwhites.
Fold the flour into the batter.

Bake 6-8 layers - your batter should be 1/4 inch thick in a pan that is lined with baking paper - for 10 minutes each in a hot oven (400F or 200C) - they should only be lightly browned.
Turn out and remove the paper immediately.

Make the caramel glaze

3/4 cup of sugar
1 tbs of butter

put the sugar and butter into a pan. Over a low heat let the butter and sugar melt into a caramel. If it is heating unevenly shake the pan, rather than stirring, as stirring can sometimes make the caramel cystallise.

Put a layer of your cake on a piece of baking paper in a baking tray. Pour the caramel over the top and QUICKLY - before it cools - cut the caramel into as many slices/wedges you want the cake to have. You must do this, or you'll find it hard/impossible to cut the cake later. In between each cut you can run your knife through a pat of butter to help with any issues with stickiness. We had a fair amount of caramel run-off - which we then quickly added some crumbed walnuts to & used to snack on and garnish our finished dessert.

Assemble the cake.

place a layer of cake on a board/plate. Cover with filling, Repeat till you get to the last layer which is already covered in caramel. Ice the sides of the cake with the chocolate cream

Sit down and admire your creation. Then enjoy!


Paprikás csirke (Paprika Chicken)

paprika chicken, served with kluski/gnocchi and snow peas.
Paprika chicken is one of those simply yet amazingly tasty dishes. It is heavy in sour cream, so it's really not an everyday food, but it is a fantastic dish for a birthday treat! Seeing as I just had one of those, I had to celebrate and spoil myself :)

Real Hungarian paprika - that is, paprika grown and produced in Hungary - gives the best, most intense flavour and colour. If you can't get that, Hungarian-style will do.

I like to serve it with a little bit of green crunchy veg for texture - and snowpeas are my absolute fav for that!. makes for a lovely vibrant dish as well.


Ingredients

1 chicken, jointed (ask your butcher or use the equivalent in size of wings and legs from the supermarket) - keep the meat on the bone, it improves the flavour.
2 onions finely chopped
2-3 tablespoons of sweet paprika
1 tub sour cream
salt to taste

noodles to serve

Method

  • Cook onions in a casserole dish in a little bit of olive oil until translucent.
  • Add in meat and brown skin.
  • Add in the paprika.
  • Cover the chicken with water so that it is *just* covered - the more liquid, the runnier the sauce will be.
  • Place in a oven at 180 degrees C and cook for 40mins-1hr until the meat is tender and falling off the bone.
  • take out of oven, and add in sour cream, a bit at at time, until you get the flavour balance you are looking for. Season to taste.

Serve over noodles.

Friday, June 15, 2012

Pierniki - Polish spice cookies


I love these biscuits (cookies for the Americans!!)- their sweet spiciness is a must for Christmas. While it is not Christmas, I thought I would share these with you. 


* 1 cup Honey
* 6 cup plain flour*
* Pinch of black pepper (optional)
* 1/2 ts Cinnamon
* 1/2 ts Nutmeg
* 1/2 ts Cloves
* 1/2 ts Allspice
* 4 Eggs
* 1 cup Sugar
* 1 ts Bicarb Soda


Method


1. Heat honey in a saucepan until it begins to boil, and then allow it to cool to lukewarm.

2. Combine eggs and sugar in a bowl and beat together until thickened.

3. Mix all dry ingredients together in a separate bowl.

4. Slowly add the dry ingredients to the egg and sugar while mixing to prevent any lumps.*

5. Pour in the honey and mix everything until smooth.

6. Turn out the mixture onto a lightly floured surface, and roll out to around 1/4 inch thick. Cut into shapes as desired.

7. Place Pierniki onto a greased baking tray, then into the oven at 190C for 12 minutes or until lightly colored.


* Start by adding 4 cups of flour, and then adding more in until you have a soft but workable dough. Quantities will vary according to the size of your eggs etc. Do not to add any more than the 6 cups.

Saturday, June 2, 2012

Ricotta and egg ravioli

I did it!! I did it!! I made a ricotta and egg ravioli with burnt butter and lemon. And it was delicious!!

And it was my first time making an italian pasta!! I have to admit, the pasta was not perfect - it was a bit too thick. I'm not sure whether I overworked the dough, didn't have enough liquid, or just didn't roll it thinly enough. It tasted OK, though.

As for that ravioli - omg, how absolutely amazing is that combination of lightly spiced ricotta, runny egg yolk, and burnt butter. This will definitely be made again!


I took the recipe from http://www.deliciousdays.com/archives/2007/05/24/an-extra-dose-of-sunshine-egg-ravioli/ as my base, but I did change it somewhat to reflect the flavours I saw on Masterchef Australia (they didn't have the recipe up on their site when I went looking).

Ingredients and Method
The pasta dough:
200 g flour, Italian Type 00
2 eggs
salt

Sift the flour into a huge mixing bowl or on a chopping board. Make a well in the center, add a pinch of salt as well as the eggs, then incorporate the flour with your fingers and knead for about 5 minutes or until the dough comes together nicely. If the mix is too firm, add a little water, if it’s too soft, use a little more flour. Shape it into a ball, tightly wrap in cling film and let rest for at least 30 minutes on the counter.

The filling
200g Ricotta
zest of one lemon
1/2 tsp nutmeg
small egg yolks, preferably free range (amount depending on the number of egg ravioli you want) egg white (to brush the pasta sheets)

Mix together, season with salt and pepper to taste.

cut sheets of pasta into rounds (I did squares, cause I wasn't thinking...) Place the ricotta in the middle, with a little well in the centre. Put the yolk into the well. Cover with another sheet of pasta, crimp closed. Brush with egg white.

Cook in boiling salted water until the pasta is al dente.

for the burnt butter and lemon sauce
100g butter
1 tablespoon lemon juice Add butter to pan and heat until butter begins to foam. At this point, add the sage and cook until butter has browned. Squeeze in the lemon juice and serve sauce immediately over ravioli.

Mint and Apple Jam

This mint and apple jam is tangy and savoury and oh so perfect with lamb dishes. It is also makes a terrific base for a salad dressing - stir in a little olive oil to loosen it a little and then stir it through a garden salad or just chopped up cucumbers for an unforgettably yummy salad.

Traditionally mint jelly and mint jam use granny smith apples, but in this version I substituted with some lovely tartish red apples.  It has added a beautiful reddish tint to the jelly, which makes it look quite festive in my opinion!

You can also change the type of mint - or even the type of herb used. Apple and rosemary or apple and thyme also make really nice condiments to serve with pork or lamb.


Ingredients
500g apples, cored and roughly chopped
375ml white vinegar
400g of sugar
4 - 6 tbs chopped mint.

Method
Cook apples in vinegar and sugar until soft. Use a potato masher to break down the soft pieces of apple. Bring to boil, and boil for 10 minutes until the mixture starts to jell.

Turn off the heat, add the chopped mint and stir through. The residual heat will cook this through.

Pour into sterilised jars.


Tuesday, May 15, 2012

Pizza Dough

Pizza with skordalia and onion topping
This little  pizza is extremely easy to make, and just as easy to adapt. It uses a quick home-made pizza dough that literally only takes 5 minutes to make - nearly as quick as pulling a frozen one out of the freezer!


Ingredients
1 1/2 cups warm water
2 tsp  dried yeast
1 tsp of caster sugar
4 cups plain flour
Place all ingredients in a bowl. Combine, then knead into a dough. Set aside while you assemble the topping. When ready roll out to fit into your pizza dish, then top and cook in a hot oven (215 degrees C).

Onion Topping
store-bought or home-made skordalia or garlic dip
1 tsp salt
60ml (1/4 cup) olive oil, plus extra for brushing
1 onion 
Slowly caramalise the onion in olive oil to bring out the sweetness of the onion. Season to taste with salt and pepper.
smother the pizza base with skordalia/dip
cover with the caramelised onions.
Bake until the dough is browned through.

Sorrel Soup (Zupa Szczawiowa)


French Sorrel - you can get some at
Four seasons herbs
The Polish have been foragers for many generations, and our family is no exception, as you might have gathered from the excitement over mushrooming or the collection of - ahem - windfall apples! Sorrel grows wildly in much of Europe, and you can occasionally find patches in Australia as well - though it is not a native here.

To make my foraging life easier, when I found some "French sorrel" at the nursery I just had to get some.  This is a lovely large leafed plant, with leaves that resemble that of English spinach. To look at anyway - the taste is quite different. Sorrel has a slightly lemony tanginess that I adore. There are many other varieties of sorrel - my grandmother used to grow wood sorrel under her trees and I have fond memories of chomping on its tart stalks on summer days.

Sunday, May 6, 2012

Gołąbki (Stuffed Cabbage Rolls)


Gołąbki
Serves .... about 12 ... ish

I used to love it when my babcia would make gołąbki. It was usually in autumn, when the cabbages were big and beautiful, and the days were cool enough to light the wood stove. Making gołąbki is not exactly difficult, but it is time-consuming - all that steaming of cabbage takes time - but I think the end result is worth it. When I saw a beautiful organic perfect cabbage at the wholefood coop last week I knew what I had to do. I still have the pot that my mother and grandmother used to make gołąbki, so it feels a little like they are still here with me in some way.

You could make a smaller amount of these cabbage rolls. That would lessen the cooking time. With all the effort that you go to, however, I think it makes as much sense to make a whole batch. I find that they freeze surprisingy well, so I make as much as I can out of one cabbage. Then as winter progresses, I can pop them out of the freezer to defrost in the fridge either the the night before or in the morning, and then heat them either in a frypan or in the oven for an easy dinner whenever I feel like it!


Ingredients
1 whole head of cabbage (large leafed, not savoy)
2 onions chopped
2 or 3 cloves garlic finely diced
800g beef mince
500g pork mince
3 cups cooked rice
2 tins chopped tomatoes
2 cups beef stock
1 cup of tomato sauce


Method
Take off the outer leaves of the cabbage and lay half of them in some water on the bottom of a large pot.
Bring it to a steady simmer.

Core the cabbage. lay it on the leaves, cover with the rest of the leaves and put the lid on the pot. Steam until the leaves come off easily. With some cabbages this may mean steaming, pulling off half the leaves, and then steaming again.
My lid did not fit easily... I laid it on top of the leaves, though!

While the cabbage is steaming mix the garlic, onion, rice, beef mince, and pork mince, and 1 tin of tomatoes until they are combined. When the cabbage leaves have been separated it is time to fill the leaves. You may need to cut peel the stem of the cabbage in order for it to roll more easily. 


Lay the cabbage leaf down. Place a ball of the stuffing into the centre. Fold the bottom up to cover it, then fold the sides in. Lift the leaf and stuffing and roll it onto the top of the leaf to close it. Continue filling until you run out of mixture or out of large enough leaves. I find most cabbages make between 20 to 30 rolls.

The following vid shows you how it is done... don't laugh, it's really hard to roll these with one hand!!


Discard the water from the pot you steamed the head of cabbage in. Replace half the outer leaves of the cabbage on the bottom. Place the cabbage rolls in the pot, filling each layer, until you have filled the pot to capacity. (I have never not been able to fit all the gołąbki into the one pot, but you never know - that day may come!). Pour in the tomatoes, beef stock, and tomato sauce into the pot. Cover with the rest of the leaves, put the lid on the pot, and put the pot on a slow heat. Leave it for 40mins to 1 hour - until all the gołąbki are soft and cooked.

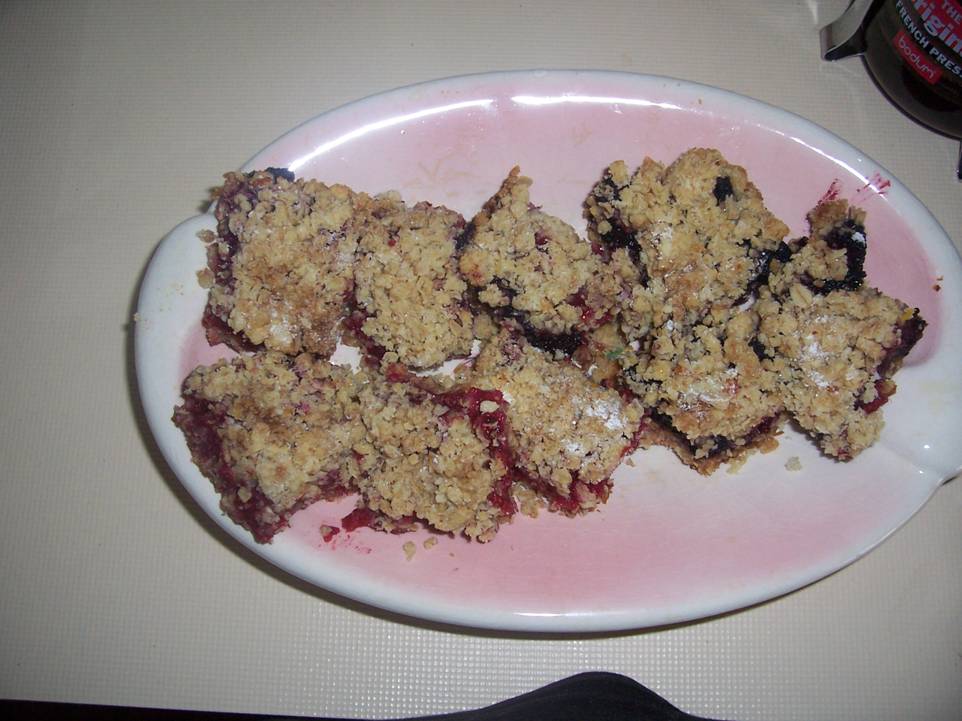
Gołąbki in a serving dish, ready to be put on the table


Serve - my grandmother always served them with mashed potato and green beans. I like them like that too, but tonight I just had them with some crusty rye bread. It was cooked at home, but came out of a packet... still, it looks good, right? And there is no better bread than bread straight out of the oven...

Light rye bread hot out of the oven...
perfect for sopping up those leftover juices...


Wednesday, April 25, 2012

Extreme Chocolate Biscuits

I felt like a bit of a chocolate hit tonight - so I made some extreme chocolate biscuits. These are a crunchy biscuit which can be sandwiched together with cream or ganache, or served as is with a little icing. I chose the latter as I had no cream.

Ingredients

125g butter
75g sugar
125g plain flour
50g cocoa powder (the nicer the better)


Filling
either...
a ganache of 125g or chocolate melted into 50 ml of cream
or stiffly whipped cream with a hint of vanilla and cinnamon


Icing
Icing sugar
cocoa
enough milk to make an icing

nb... i added some chopped walnuts to my icing... which I obviously just threw on the biscuit... dearie dearie me. A food photographer I will never be!!

Method

Preheat oven to 160C.
Beat sugar and butter till fluffy,
Add in flour and cocoa powder and mix with hands to a dough
roll out to 1 inch thick. cut into desired shapes.

Bake for 15 minutes, until firm.

Cool, then fill and/or ice.

Tuesday, April 24, 2012

Diós csók (Walnut Kisses)!!

Well... you've got eggwhites left over from making Pączki .. so what are you to do. Well, I suppose you could make an eggwhite omelette or something just as healthy, but if you want to be a little bit decadent then make some diós csók (Walnut Kisses)!! These are light, sweet, airy, with a lovely hint of walnutty goodness. This is a little Hungarian cookie that is just divine... low in fat too, though we won't mention the sugar content lol

Ingredients

 4 egg whites beaten stiff
1 1/2 cups sugar
1 tbs lemon juice
1 1/2 cups walnuts quartered or coarsely chopped


Method

In the top of a double boiler combine the egg whites, sugar, and lemon juice, and beat constantly over hot water for 10 mins until the mixture is very thick and glossy. Fold nuts in gently. Drop spoonfuls onto a greased baking sheet.

Bake in a preheated oven at 170 degrees until lightly browned.

Pączki

These are a bread doughnut, not a cake doughnut. They are not anywhere near as sweet as the ones that you buy at doughnut stands.

Ingredients


1 tsp instant yeast
6 tsp caster sugar
230 ml lukewarm milk
450-500 g plain flour (start with 450, add in more flour if they dough is too sticky)
1/2 tsp salt
1 tsp vanilla extract
1 whole egg and 4 yolks
50 g butter


Oil for frying.


Jam of your choice for filling.
Cinnamon sugar, castor sugar, or icing sugar for dusting/glazing.


Method

Place the yeast and 1 tsp of the sugar into the warm milk, stir, and leave for 10-15 minutes until the yeast has gone frothy.

Place the flour, salt, vanilla extract and the rest of sugar in a bowl. Add in the egg, yolks and butter and combine. Start kneading the dough slowly adding the yeast mixture and the rest of milk.

Knead the dough until it is shiny and more easily handled. It will be a soft dough. Cover and leave to rise for an hour.

Roll out the dough to make 15-20 flattish balls. Leave to rise for 30 minutes.

Heat the oil to 175°C. Use enough oil for the doughnuts to float freely.  Fry doughnuts around 1-2 minutes on every side (or until golden brown). Don't overcrowd the pan, as the oil temperature will drop down. Flip them using wooden skewers (I use chopsticks - probably not so traditional!).

Take them out of the oil and put it on a plate covered with paper towel to absorb extra oil.A jam syringe is best but if, like me, you don't own such a thing then use an icing bag, insert a tip into the side of the doughnut and gently squeeze the jame of your choice in. BE GENTLE. Don't ask why I thought that required capitals... she said, looking at the jam spatters on the counter... lol!


Pączki with strawberry jam... mmmm....
To finish either dust with cinnamon sugar, castor sugar, or glaze with a thin icing made with icing sugar and hot water. I just dusted with castor sugar for a little hit of extra sweetness.

UPDATE: These do indeed freeze very well. I wrapped rows of four doughnuts in foil, and then popped them in the freezer. They defrosted well and were fine eat cold, but also were very nice warmed in the oven. Not as good as straight out of the deep-fry but nothing to pass up either :)

Wednesday, April 18, 2012

Jerusalem artichoke soup

This is a really earthy, silky soup, that really hits the spot on a cold rainy day. This recipe makes 4 main serves, or 6-8 entrees.

Jerusalem artichoke soup

Ingredients
olive oil
1 onion sliced
2 cloves garlic finely chopped
1 kg jerusalem artichokes, chopped
1 litre good quality vegetable stock
Salt and pepper to taste


Method
Saute onion and garlic in olive oil until translucent.
Add in the other ingredients and bring to boil.
Turn heat down and simmer until the artichokes are tender.
Blend/puree the soup until smooth.
Season to taste.

Serve with crusty bread, or a garnish of some fried mushrooms or bacon with finely chopped parsley or thyme.

Spiced roast vegetables

I don't know where this dish originated, but we have been making it in our family for as long as I can remember. It is a mix of roast vegetables, smothered in olive oil and spices, and baked until soft. A perfect dish for autumn, especially if you have a bumper harvest of root vegetables and pumpkins waiting to be devoured.


This is a very easy dish to prepare, and one that is tasty enough on it's own as well as a great side dish for roasts.

Spiced roast vegetables
Ingredients
Desired amount of vegetables for roasting (we usually use a mix of any or all of the following: capsicum, pumpkin, sweet potato, potato, and jerusalem artichoke - though you are welcome to experiment with other veggies as well - onions and whole garlic cloves in their skin go very nicely)
olive oil - just enough to coat the veggies
pinch of salt
paprika
nutmeg

I usually use 1 generous tbs of sweet hungarian paprika with 1 tsp of nutmeg to about half a standard baking pan/roasting pan of veggies. You can add a little bit of heat with a little hot paprika, chillis, or cayenne pepper if you want it extra spicy. ;)

Method
Cut all veggies to around the same size and arrange in dish.
Sprinkle the salt and spices on top
Add a small amount of olive oil, and mix through the veggies until they are all lightly coated with oil

Place in a 190 oven and cook until veggies are tender - usually 40 minutes or so.
Serve!

Sunday, April 15, 2012

Jerusalem artichoke chips

Jerusalem artichokes are a tuber, and a member of the sunflower family - a fact which sees them called "sunchokes" in some parts of the world. They are quite yummy, with a taste that is a little sweet, a little nutty and a little like a globe artichoke. They can basically be cooked like a potato - boiled, roasted, sauted, etc. They are lower in calories and GI than potatoes - which make them a good potato substitute for those on low-GI or low-carb diets.This is due to their high levels of inulin–a form of soluble fiber which is also a prebiotic, and therefore good for the digestive system. Inulin has also shown been shown to increase calcium absorption substantially, so if you have any worries in that department eat them with a source of calcium for a bit of a boost. They are also good sources of iron and potassium, so they are a really healthy little tuber.

What shall I cook first with this very healthy little tuber - I know! I'll make something not very healthy out of them!!! Bwahahaha!


Jerusalem artichoke chips
Jerusalem artichoke chips are the irregular shaped ones
at the top of the picture. The round chips are potato.
  • Cooking oil of your choice (I used sunflower, it seemed appropriate)
  • jerusalem artichokes sliced finely - you don't need to peel them, but make sure they are well scrubbed of all dirt!
  • salt and pepper to taste

Heat oil to about 190ºC. If you don't have a thermometer (and I don't) drop one slice of artichoke or potato in the oil to see if it floats. If it floats and does not immediately burn, the oil is hot enough for the rest of the
chips. If it burns it is too hot.

Add in the artichoke slices a few at a time so you don't cool the oil down too quickly. Cook till golden, then bring out and lay on a paper towel to absorb the excess oil. Season to taste, and serve as is or with vinegar or sauce, or whatever takes your fancy. These chips are every bit as good as potato chips, crispy, though they taste a little sweetier and nuttier/earthier.


Note: Growing jerusalem artichokes is pretty easy. All you really need to do is plant a couple of tubers in spring and wait. It'll grow into tall (up to 6ft) stalks with small yellow sunflower-like flowers. Once they die back in autumn it is time to start digging them up - usually after the first one or two frost. I started with two tubers two springs ago, and now have them planted in 5 spots in the garden. Today I harvested one out of 5 plots of jerusalem artichokes - all this came from a 30 x 30 cm spot in the garden. Talk about prolific!

Friday, March 30, 2012

Braised mushrooms and lentils

Full of protein, rich with the goodness of garlic and red wine, and low in fat - this dish has it all, and is absolutely delicious to eat!

Braised mushrooms and lentils
Serves 6-8

olive oil for sauteing
400g mushrooms, sliced
4 cloves of garlic, minced
2 onions, finely sliced
2 cups of green/brown lentils
500 ml wine
500ml water
salt and pepper to taste


Method
Saute the garlic and onion until translucent. Add in the mushrooms and cook for 2-3 mins. Add lentils and stir through. Add in wine and enough water to cover. Simmer for 30-40 minutes or until the lentils are tender. Check occassionally to ensure that all the liquid does not evaporate - add extra water if needed.

Great as is, with a piece of crusty bread. Can also be served with potatoes or rice.

Sunday, March 25, 2012

Beef with Port and Juniper

Beef with Port and Juniper

Ingredients

1 kg of casserole beef diced
2 tbs butter
2 cups of port
2 tbs flour
1 litre of stock
400g of mushrooms
2 cloves of garlic diced/minced
1 onion sliced into rings
1 tsp juniper berries


Method

Brown steak. Remove from pan.

Put port into another pan, bring to boil, and reduce until half the original liquid remains.

Melt the butter, add in the flour, and cook the roux until it is a light straw colour. Add in stock, juniper, onions, and garlic, and stir till boiling. Add in meat, mushrooms, and port. Reduce heat and simmer for 1 hour or until the meat is tender.

Serve with a green veg, and either pasta, rice, or potato. Yum!

Monday, March 12, 2012

Slippery Jack Mushrooms

We didn't find many good samples of Slippery Jack Mushrooms - apparently it has been too wet (not too surprising as we have had major flooding in the area in the last fortnight!!), and a lot of the few we did find were waterlogged. I did manage to find a few to try, however, and must say that they were delightful. They were very mushroomy ... funny that ... but very silk and smooth in texture. I cooked them simply with onions and olive oil with a little bit of butter at the end, and they really were delicious. I can just imagine them with a bit of cream, folded into some pasta - yum!

Sunday, March 11, 2012

Saffron Milk Cup Mushrooms

I went mushrooming today in the Vulcan State Forest near Oberon, NSW. We came back with heaps of Saffron milk caps, which are pumpkin-orange and very pretty, and a few Slippery Jacks which have a sticky brown top and a spongy yellow underneath. I've never tasted Slippery Jacks, and was way too tired to actually try and cook them tonight - they are a little fiddly as you have to peel them and discard the stalks etc. So I cooked the saffron milk caps instead.

Fried Mushrooms

These were amazingly tasty! And such an autumnal colour!
I can see another foraging adventure in my future :)
3 onions
3 cloves garlic
1 nob butter melted in some olive oil
salt and pepper to taste
a whole heap of mushrooms

As you can tell this is a very imprecise recipe. Basically I heat up some olive oil, put some butter in that, then saute the onions and garlic until the onions are soft. Then I throw in chopped mushrooms and cook them until they are soft, seasoning near the end of cooking. Sometimes I may add  a little more butter depending on taste, sometimes not. It all just depends on the taste!


These mushies were just lovely. Lovely firm but yielding texture, with a lovely savouriness to them I find it hard to describe the varying tastes of mushrooms, but I have to say these really were delicious.

Saturday, March 10, 2012

Kapuśniak a.k.a Cabbage Soup

This is a warming soup that my babcia would whip up every now and then. I haven't made it in years, but this autumn afternoon seemed to call out for it - and I had all the ingredients in the kitchen, which always helps! This soup always seemed to me to be the epitome of peasant food - hearty, filling, tasty - and cheap to make!  It has a whole sweet-sour-salty vibe going on that just elevates it from boring to sublime. Then again, I might just be a little bit biased!

Kapuśniak a.k.a Cabbage Soup

1/2 white cabbage
4-6 potatoes
2 onions
200g smoked pork (you can use bacon, leftover pork roast etc) ** Vegetarians - just omit this or replace with a smoked tofu :)
1 litre of chicken stock + 1 litre of water
1 cup of saurkraut (if you don't have any handy a tablespoon of white vinegar or the juice of 1 lemon can be substituted).

Saute the onion until translucent. Add in the pork and saute until any fat renders off. Add in the remaining ingedients, bring to boil, then simmer until the potatoes are cooked and the meat is falling apart.

Season to taste, then serve with crusty bread.


This recipe easily serves 8.

Smacznego!

Monday, March 5, 2012

Gulyás leves (Goulash Soup) - Authentic Hungarian Goulash!

Gulyás with crusty bread - a lovely warming meal.
This version was made with sweet paprika.
There are many different recipes for Goulash on the web - so what makes mine authentically Hungarian? Well, it comes from my father who is authentically Hungarian, of course!! This dish has a beautiful red colour to it, and a spiciness that contains no heat,  from the sweet paprika used to flavour it.   Real Hungarian goulash is a soup, not a stew. This same dish thickened into a stew is more rightly called a Pörkölt instead of a Gulyás.


What I am giving you here is the most basic recipe - to this people add all sorts of things - a spoon of tomato paste, carrots, caraway, and garlic, for example. Some cooks add potatoes, but others will tell you to never "spoil" the taste of goulash with potato. I say, do whatever rocks your boat! We never add potato, prefering the taste of the "unspoilt" soup lol! Green capsicums are usually used in this dish, but I used red as they were half the price of the green!

This dish is also brilliant to make in a slow cooker - just add in all the ingredients and off you go!

This was the gulyás I made last night, with smoked paprika.
Turned out to be quite yummy!!

Gulyás
1 kg beef (choose a casserole cut)
3 onions finely sliced
2 tbs sweet Hungarian paprika
2 green capsicums, chopped  
water


Saute the onions until translucent. 
Brown the beef in with the onions.
Add in the paprika and capsicums.
Pour in water to completely cover the contents of the pot, and a wee bit more.
Bring to a boil, then reduce heat and let simmer until the beef is tender.
 
Serve it with crusty bread or some noodles & enjoy!


Note: I've found that smoked paprika will do at a pinch too, when you find out at the last minute you're out of sweet on a rainy evening when you're in your jammies, and the meat has just been browned!!! Changes the flavour, obviously, but still is mighty tasty!

Monday, February 20, 2012

pierogi grzybowe - mushroom Pierogi

This is the first time I have made pierogi since my mother died a few years back. Making pierogi is one of the happiest memories I have of my dear babcia (my grandmother) and my mother. We usually favoured a sweet cheese pierogi, but there are many different varieties and fillings.  This one is a good one for Lent (which is starting soon) as it contains no meat - but is so tasty you don't miss that at all!
Pierogi Dough

1 egg yolk
Pierogi grzybowe - lightly refried the next day
2 cups of white flour, sifted
1/2 cup water

Mix the flour with the egg yolk and water, and mix together. Knead until it is a smooth dough that doesn't stick to your fingers. Pop it into a container, cover with plastic, and leave in fridge until ready to use.

Mushroom Filling
450g fresh mushrooms, finely chopped
olive oil for frying (add in 1tsp of butter for a hint of extra flavour)
1 medium-sized onion, finely chopped
2 tablespoons breadcrumbs
1 tablespoon parsley, chopped

lightly saute the onion until translucent. Add the mushrooms and cook gently for 10-15 minutes until all the moisture has been sweated off. Stir breadcrumbs and parsley through the mushrooms.

Assembly & Cooking
Look at all that mushroomy goodness!
Roll out walnut sized pieces of dough into circles, place a spoonful of mushroom filling in the centre. Fold the dough over, and crimp to close. The dough should be elastic enough to stretch easily over the filling.

You can make the pieces as small as desired (little dumplings for soup) or larger ones.  

Drop the pierogi into boiling salted water. They are cooked when they float to the top. Pierogi can be eaten straight from the pot, re-fried or baked the next day, or added to soups (if you make little dumplings!).
 

Saturday, February 18, 2012

Raspberry Jam - in the Microwave!

Yep. Jam. In the microwave. This is a sure-fire recipe to make berry jam. I've made blueberry, strawberry, and raspberry jam this way. I'm guessing you could probably do stone fruits this way as well but I haven't tried it. It is most useful for small batches where you don't want to go to all the trouble of stove-top jam. Make sure you use a container that is large for the amount of fruit - so the fruit comes no more than 1/3 of the way up the side - as the jam will boil vigourously.

Raspberry Jam
200g of raspberries
100g of sugar

(or any amount - just the same ratio ie twice the amount of fruit to sugat).

Put in a microwave safe container. Microwave on high for 5 mins. Give it a stir. Test for jell point and then microwave for 1 minute at a time until jell point is reached. Pour into a warm clean jar and cool.

I have to admit, I usually just microwave for 7 minutes and it usually works out fine without testing - but if you want to be absolutely positive it will work test it.

Jell point testing - put a dish in the freezer. To test for setting put a small dollop of the hot liquid on the plate. Leave in freezer for 40 seconds until it is cool and then push at it with your finger. If it leaves wrinkles on the surface of the jam, it is ready.

Wednesday, February 8, 2012

Peach Jam

The last of the peaches in the box I bought at the local farmers markets were getting very ripe - time to make jam! Making jam from stonefruit like cherries, peaches, and apricots, is quite easy to do. I never use pectin or jamsetting agents and the resulting jam is usually quite luscious. It isn't as "jelly"-like as that found in supermarkets, but it is thick and spreadable and - well - jammy! I quite like that soft gummy lusciousness of home-made real jam. Real jam also has no preservatives, additives, or artificial colours. It always beggars my belief that most jams produced in Australia have preservatives in them. Home-made jam can last for ages. I've had it sitting there unopened for a year without any problems at all. I've also bought imported French jams that contain no preservatives... anyway, I shall just shake my head and end my ranting!

Walnut sourdough with home made peach jam!
Peach Jam
1 part sugar
2 parts peaches (or you can substitute other stone fruit, or a mix of stone fruit, if you wish)
1/2 lemon per kilo of peaches

I realise that what I have given you is a ratio, rather than a recipe! A lot of other recipes call for a 1:1 ratio of fruit to sugar, but I've always thought that leaves you with an overly sweet jam. As it is, I think the ratio with the overripe peaches is a tad too sweet - but that is just my taste!

Place sugar and sliced peaches into a pot. Heat slowly so the peaches release their juices and dissovle the sugar. Squeeze in the lemon. Heat on medium heat until gently bubbling. Cook for about 20 minutes and then start testing for the jell point (see below). Test every 5 minutes until jell point is reached. Then take off the heat. Pour into clean warm glass jars, top with lids, (you can also get plastic wrappers and elastic band jam sets in the supermarkets). I then wrap them with teatowels so they don't cool too rapidly & crack the glass. Once they are cool place them in fridge or cool dark pantry. Once opened, of course, refridgerate.

Jell point testing - put a dish in the freezer. To test for setting put a small dollop of the hot liquid on the plate. Leave in freezer for 40 seconds until it is cool and then push at it with your finger. If it leaves wrinkles on the surface of the jam, it is ready.

Monday, February 6, 2012

buraczki ze smietana (Beets with sour cream)

This is great served either warm or chilled. I personally love the little hits of dill and pepper against the sweet creamy beet. Some recipes add horseradish to taste, and this adds a lovely sharpness and bite to it which makes it a spicy side to meat dishes. Personally, I like it creamy, with a hint of lemon to add just a hint of acidity.


buraczki ze smietana
4 beetroots
3/4 cup of sour cream
salt and pepper to taste
juice of 1/2 lemon
a couple of fronds of dill to stir through (reserve some for garnish)

Cook the beets in boiling water until just done. Cool until able to be handled, then peel and grate them.
Stir the sour cream through (and horseradish if you are using it), season to taste. Sprinkle with dill, squeeze the lemon juice over, and stir till combined. Garnish with extra dill. Serve warm, or chill in the fridge for 2 hours if you are wanting to serve cold.

Friday, February 3, 2012

Peach tart

This is a little fruit tart that is quick to whip up and pretty forgiving on quantities. Basically you are making a very thick batter, pouring that into a pie dish, and covering it with fruit slices. This makes a dryish sort of biscuity base, which is quite nice but I think needs something to help it along. If you use fruit from a tin I suggest that you pour some of the tinned juices over the tart when it comes out of the oven. You can also make the optional syrup and pour that over the hot tart - gets very sweet and sticky. You can also use any other type of fruit on top - whatever takes your fancy!

Peach tart
3/4 cup plain flour
3/4 cup of almond meal
75g butter
5 tbs sugar (or to taste)
1/3 cup milk - (or enough to make a thick batter)
2 eggs
1 tin peaches or 2 large ripe peaches

Cream the butter and sugar. Whisk in the eggs. Add in the flour, almond meal, and milk and combine till it forms a thick batter. Pour into the bottom of a pie dish. Arrange slices of fruit around the top. Sprinkle with cinnamon. Cook at 180 degrees for 30 mins or until the cake has set.

optional syrup
1 cup sugar
1 cup water


Bring the water to a boil.. Dissolve the sugar into the boiling water, stirring constantly. Pour some over the hot tart when it comes out of the oven.